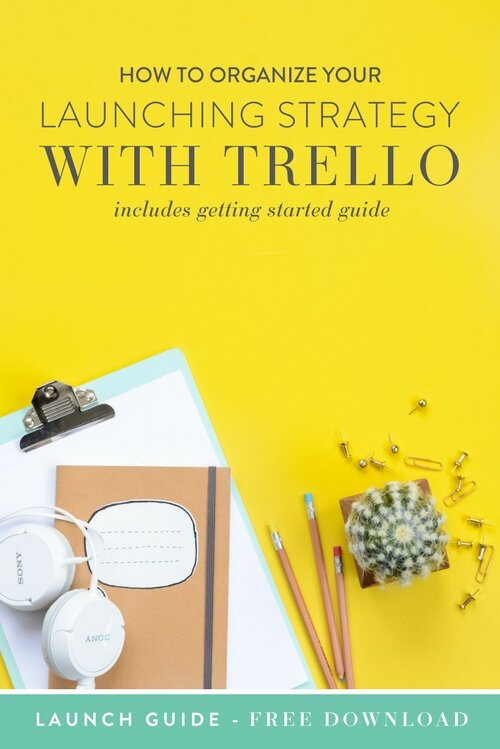
How to Organize Your Launching Strategy with Trello
Abagail here. Raise your hand if launching gives you the heebie jeebies. I get it, boss. There are a million and one moving pieces and it’s hard enough for you to remember all the steps - let alone have some sort of organization that helps you keep it all together. My own launching methods included Dropbox folders overflowing with graphics, Post-it notes with never-ending to do lists and serious anxiety that I was going to forget something along the way.
Whether you are launching something ginormous like a new product or service or something a bit smaller like a blog post, you still need a single system to help you organize, track progress and flawlessly implement your launch.
Trello is Awesome
Ok, perhaps slight overstatement. Out of the box, Trello looks like just about every other project management system on the market. But, when you unlock and master its hidden potential you will sing its praises on the daily.
Inside Trello we manage daily tasks and construct large and complicated launch plans that are super easy to implement. We can see at a single glance the progress we’ve made and the steps we have left. And like icing on a cake, we didn’t have to pay for an expensive launch coach, project manager, or even VA to get it all setup.
We can go from idea to $10k+ launch in under 30 days.
The Secret Formula
Here’s the exact process we use every single time we have a launch.
STEP 1: BRAINDUMP
You’re creative. You’ve got new ideas on the daily. Ideas are not in short supply. But often they are swirling in your head. For some this may seem “normal”, but for the majority it is probably giving you unnecessary anxiety. “How am I going to do it all?” “I can’t do this on my own?” “This idea is the best one I’ve ever had, but how can I execute it?”.
You’ve got to stop asking questions and just get it out of your head. Every time something crosses your mind - whether you will ever actually do it or not is irrelevant - you need to get it out. You need to give it space.
We keep an ongoing list of boss ideas inside our Big Picture Strategy. This gives us a place to let it all out, without jumping every time a new idea hits the brainwaves.

STEP 2: MAKE A LIST & CHECK IT TWICE
Got it? Have that special thing in mind you’ve been waiting for?
Awesome. Now it’s time to nail down all the steps as a checklist.
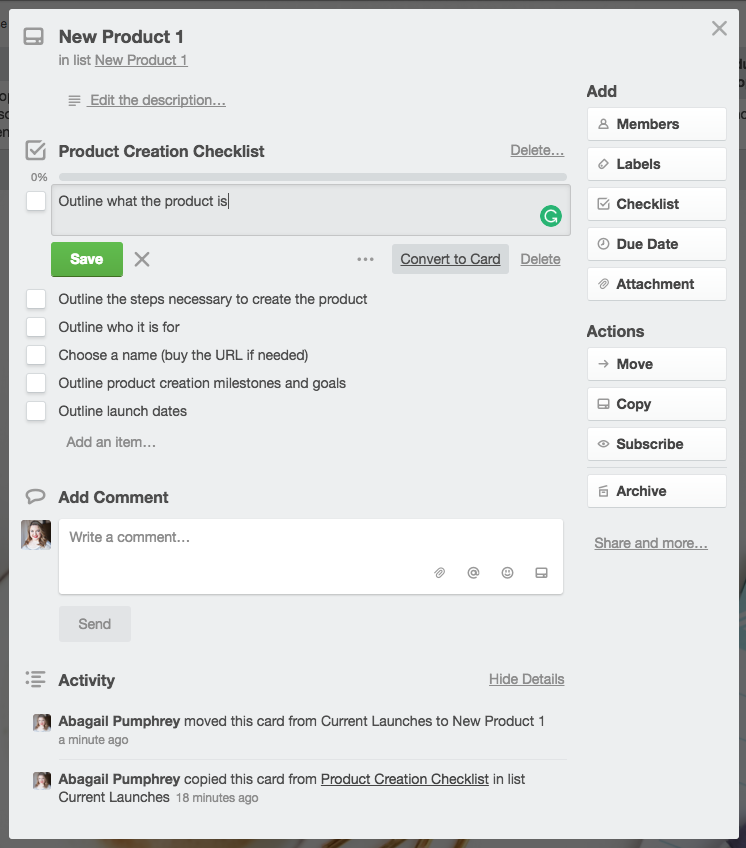
You will first create a new card in the “Current Launches” column inside Big Picture Strategy.

Inside that card you will create a checklist of EVERYTHING you need to do in order to launch that thing. Get as nitty gritty as possible. Our course launch checklist has more than 36 steps. That’s totally fine. Don’t stress about the volume of work. It is more important to break down each step into doable chunks. Don’t be afraid to get specific.

Now, before you go running to do all the things, this list needs time to breathe. Leave it for a couple of days. As you remember additional steps, add them to your checklist.
Before this step is complete take a couple minutes to review it and make sure you haven’t missed anything. Drag and reorder individual tasks so they are in the most logical order to complete them.
STEP 3: CONVERT YOUR LIST TO INDIVIDUAL TASKS
Since you’ve gone through the trouble of outlining every little thing it will take to launch I HIGHLY suggest you make a copy of this card and save it to your Processes List inside Your Business Blueprint. That way when you decide to launch again you already have all the tasks necessary outlined in advance and you can just do a quick review instead of totally reinventing the wheel.
Now, who's ready for my FAVORITE PART of this whole launching process?
Before you start you will need to create a new list. Title it the same as you did your original card.

Drag the card you created with all the individual tasks over to this list.

Now, starting at the top of your checklist, convert each item to a card.
At this point you should have a list with an empty card at the top and each checklist item should have their own card.

Before you move on, go ahead and delete that empty card by hitting archive and then delete.

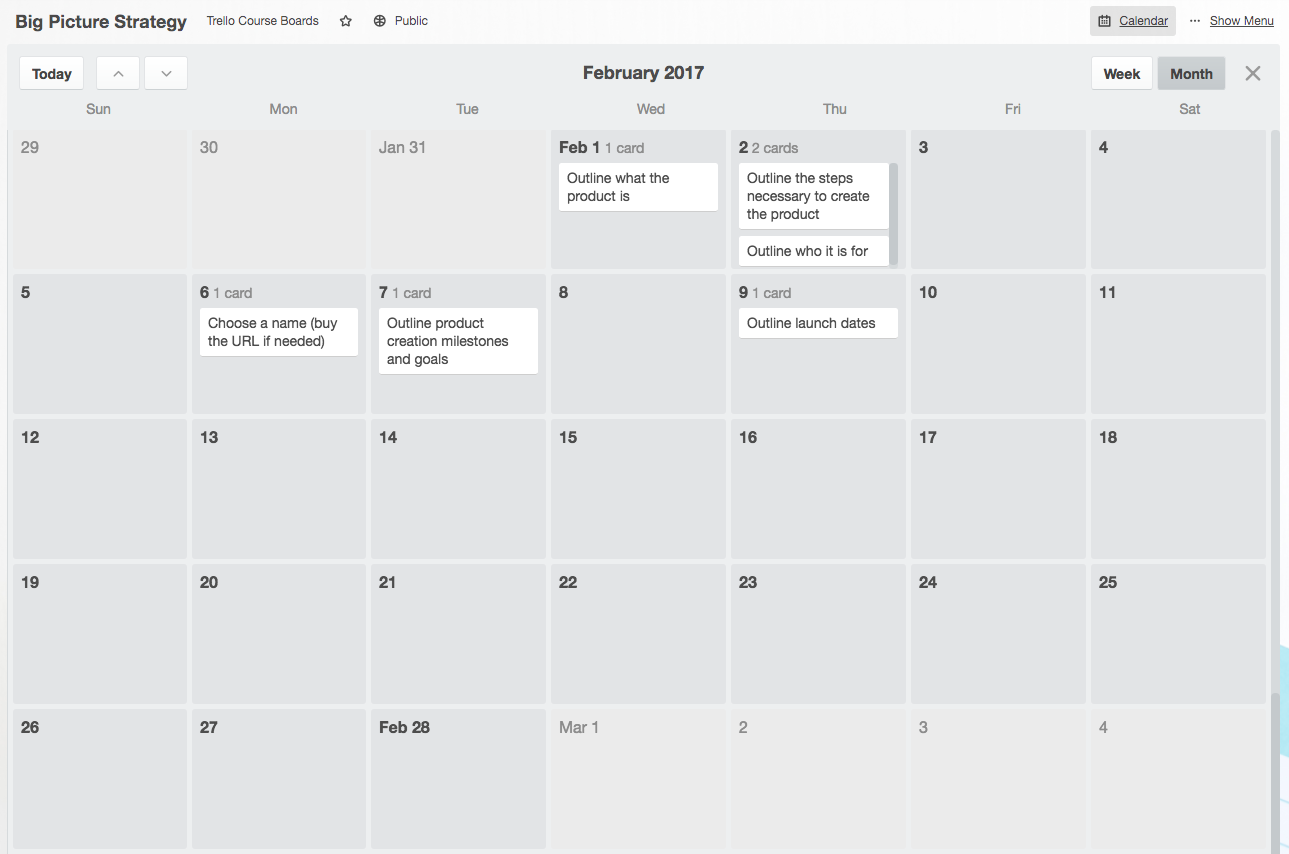
STEP 4: ASSIGN DATES FOR INDIVIDUAL TASKS
You’ve already done the hard part. You outlined EVERY SINGLE TASK! This part is even simpler. Now that you have your individual items as cards you can assign dates to each one.

Go through and assign dates for each task. Keep in mind that on some days you may be able to do more than one task, but other tasks may need several days to implement. Be mindful of other things already on your schedule and assign them in the order that they are on the list.
Now at a glance you can see your launch schedule in list form.

Or in Calendar View.
STEP 5: JUST DO IT
Now as long as you follow your own outline, in a matter of weeks you could be in full on launch mode, ready and armed with everything you need. It’s just a matter of holding yourself accountable to the dates you set and being mindful of what you can actually accomplish.
You got this, babe.
Need some more help? No problem. We know launching can be a bit overwhelming. Inside Trello For Business we not only walk you through this process and many others (in video format), but we give you copies of all of our boards and all of our processes, including our fan-favorite, Launch in a Box. We’ve already put in the work so you don’t have to. We’ve thought out a launch plan. It’s ready for you to copy and paste. You can get started right now.
Need help with your next launch? We’ve got the goods on generating the right buzz and planning it out so you can be super successful. The best news is that it’s totally free. Yup, you can snag your copy of our latest ebook right here.